
You’re peeling back layers of paint like lifting a veil on the past. Start by auditing what’s genuinely Victorian—sash windows, cornices, ceiling roses, fireplaces, encaustic tiles—and note condition, previous repairs, and any listed-building constraints. You’ll then restore with the right materials, keep breathability, and introduce contemporary colour and lighting that respects the original detailing. Get the order wrong, though, and you can lock in damp or ruin crisp profiles…
Key Takeaways
- Audit each room to identify original Victorian features, distinguishing later additions by moulding depth, timber type, and fixings.
- Prioritise repairs by rarity, condition, and budget, then photograph, measure, and label details for accurate restoration.
- Repair plasterwork and cornices by stabilising loose sections, moulding missing details to match, and finishing with breathable mist coats.
- Restore fireplaces and sash windows using gentle cleaning, lime-based repairs, retained original materials, and discreet draught-proofing that preserves sightlines.
- Refresh encaustic tiles and period floors with pH-neutral cleaning, lime-mortar bedding, and breathable sealers, then add contemporary lighting and minimal décor.
Audit the Victorian Features Worth Restoring
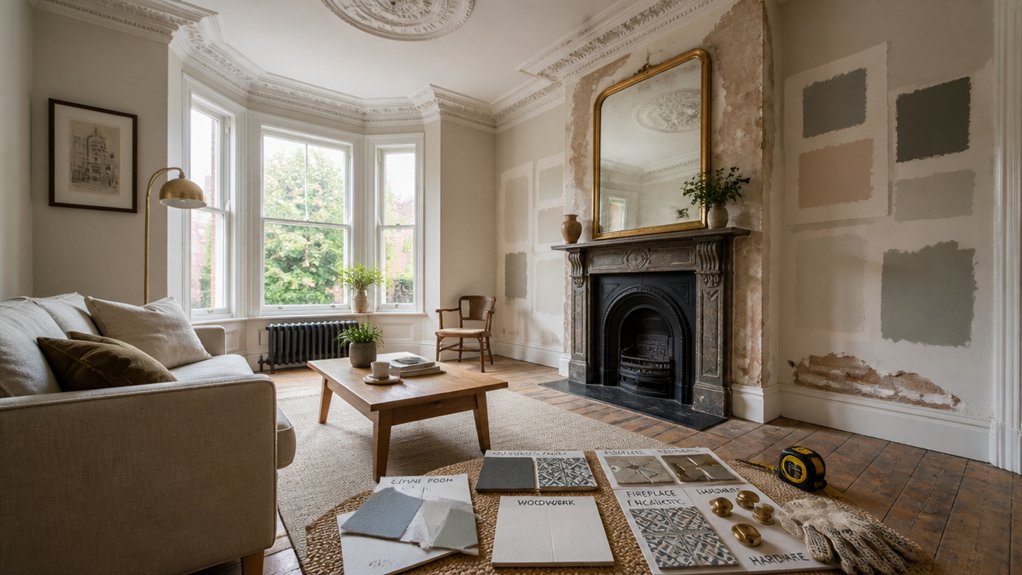
Before you pick up a chisel or call in a joiner, carry out a disciplined audit of what’s genuinely Victorian—and worth saving. Start room by room with a torch and notebook, checking skirtings, architraves, doors, stair parts, encaustic tiles, chimney pieces, and sash windows for tool marks, old paint lines, and consistent profiles.
You’ll separate later “period” additions from original Victorian architecture by comparing moulding depths, timber species, and fixing methods (cut nails versus modern screws). Photograph details, measure key sections, and label what’s missing, altered, or damaged.
Cross‑check against local pattern books, Historic England guidance, and neighbouring terraces to keep historical accuracy. Finally, rank items by rarity, condition, and cost, then plan works around live services and access.
Repair Victorian Plasterwork (Cornices and Roses)
Although hairline cracks and sagging edges can make Victorian cornices and ceiling roses look beyond saving, you can usually repair them in situ if you diagnose the cause first. Check for historic water ingress, failed laths, or movement from over‑sanded joists, then stabilise before you fill.
Support any droop with props, inject adhesive behind loose runs, and resecure with stainless screws and plaster washers. For losses, take a silicone mould from an intact section so your new cast matches Victorian craftsmanship.
Use lime putty or casting plaster to suit the original, then feather joints and re‑cut details with a small modelling tool. Finish with breathable mist coats after curing to aid Plaster restoration.
- Trace the crack pattern
- Fix moisture sources
- Pin loose plaster
- Cast matching repairs
- Sand lightly, prime
Restore a Victorian Fireplace Safely and Simply
Before you touch the surround, you’ll assess the fireplace structure, hearth integrity, and flue venting. You’ll stop if anything suggests a blocked or unsound chimney.
Then you’ll clean soot and residues properly, repair cracked firebricks or loose tiles, and reinstate any missing mortar with suitable, heat-resistant materials.
Finally, you’ll seal joints and finishes to control dust and improve draw, keeping the work compliant with UK safety expectations.
Assess Structure And Venting
Once you’ve uncovered the fireplace opening, assess the surround, hearth, and recess for movement, cracking, or heat damage, because any instability will compromise both safety and performance.
Start with structural assessments: check masonry joints, lintel bearing, and whether the hearth sits proud and sound.
Then turn to venting considerations, as Victorian flues often suffer from partial collapse or historic alterations.
- Confirm the lintel isn’t bowed, spalled, or under‑supported
- Check the breast for bulging, stepped cracking, or loose bricks
- Verify the hearth’s thickness and projection meet current expectations
- Inspect the throat and gather for obstructions and misalignment
- Test the flue route and draw (smoke pellet) and note ventilation paths
If anything looks doubtful, stop and book a HETAS engineer or local chimney specialist before proceeding.
Clean, Repair, And Seal
With the surround, lintel, hearth, and flue judged sound enough to proceed, you can now tackle the soot, salts, and failed mortar that make old Victorian fireplaces look tired and leak air.
Start with dry cleaning methods: HEPA vacuum, soft brush, then a soot sponge; avoid saturating porous brick. For stubborn tar, use a mild alkaline cleaner, rinse sparingly, and dry thoroughly to prevent efflorescence.
Rake out loose joints to 15–20mm, then repoint with lime mortar (NHL 2) so the masonry can breathe; match aggregate and profile.
Replace cracked firebricks and fit a new register plate if needed.
Finish with sealing techniques: apply a breathable silicate sealer to brick, and use fire-rated rope and high-temp sealant around the stove pipe to stop draughts.
Repair and Draught-Proof Sash Windows (Options)
Next, you’ll want to get your sash windows working properly by addressing common faults such as rotten sills, loose glazing putty, failed cords and sticking sashes before you touch the paintwork.
You can then cut heat loss and rattles with draught-proofing options ranging from brush pile carriers and staff-bead seals to discreet compression strips, all fitted so the windows still slide freely.
If your property is listed or in a conservation area, you’ll need to keep original timber and sightlines, so choose repair methods and seals that meet local planning expectations.
Sash Window Repairs
- Ease sashes out, label beads, and check the frame for movement.
- Replace cords, service pulleys, and balance weights to restore smooth travel.
- Tighten joints, glue and pin where tenons have loosened.
- Reglaze with linseed putty and new sprigs, keeping existing glass where possible.
- Overhaul sash lock mechanisms, align keeps, and fit period-correct fasteners.
Finish with breathable primer and a micro-porous topcoat for longevity.
Draught-Proofing Options
Where do most Victorian sash windows lose heat and rattle on a windy night? Usually at the meeting rails, staff beads, parting beads, and the gap around the sash box.
Start by checking sash alignment and easing any binding; poor fit defeats every upgrade.
For discreet weather sealing, fit brush-pile strips into routed channels in the staff and parting beads, then add a compression seal at the meeting rail to stop whistling.
Replace perished putty and seal the frame-to-wall junction with decorator’s caulk, not expanding foam.
If you need stronger insulation solutions, specify a slimline double-glazed sash or add a secondary glazing panel on the room side; both preserve sightlines and satisfy many UK conservation officers.
Restore Encaustic Tiles and Period Floors Cleanly
Although encaustic tiles and period floors were built to cope with hard wear, you’ll get the best results by restoring them with a clean, low-impact approach that respects original glazes, pigments and bedding materials.
Start by vacuuming grit, then wash with pH‑neutral cleaner and warm water; avoid steam and strong acids that can etch.
Lift old wax with a citrus-based stripper, rinse thoroughly, and dry fast with airflow to protect lime-based beds and timber subfloors.
Repair loose tiles with lime mortar, not cement, and replace only like-for-like where necessary.
Finish by sealing: breathable impregnating sealer for Encaustic tiles, hardwax oil for Period floors.
- Vacuum thoroughly
- pH‑neutral wash
- Strip wax gently
- Re-bed with lime
- Seal appropriately
Blend Restored Victorian Details With Modern Colour and Lighting

Once you’ve cleaned, re-bedded and sealed your encaustic tiles or period floor, you can let those revived surfaces set the tone for a scheme that feels both Victorian and current.
Build color schemes from the tile palette: pick two of its dominant pigments, then add a crisp modern neutral such as warm white, putty or soft charcoal on walls and woodwork. Keep ceilings lighter to emphasise height and cornices.
Use matt paint on plaster, but a durable eggshell on skirtings and architraves for practical UK living.
For lighting techniques, layer: discreet downlights for task areas, a statement pendant in the hall, and wall lights to graze coving and highlight fireplaces. Put everything on dimmers, and choose 2700–3000K LEDs for period warmth.
Conclusion
You’ve audited what matters, repaired plasterwork with lime, made the fireplace safe, tightened sash windows, and cleaned tiles and boards without stripping their patina. Now treat your home like a well-restored pocket watch: every original gear should still show, but it must keep modern time. Stick to a calm, neutral palette, add layered lighting, and choose simple furniture lines. You’ll honour Victorian craft while living comfortably, efficiently, and stylishly.
About the Author